Everyone knows about the blessed golden hour, but its mysterious sibling, twilight hour, is lesser known. This time should more aptly be called “twilight half hour” because it is so brief. Right before the sun rises fully & sets completely, twilight lies. It can add moodiness and intrigue to portraits. Here’s how I utilize it below. Show up early Just like with golden hour, I recommend you arrive at your location early as to not miss the short time you have. Pack a fast lens Since it is darker, your camera’s sensor will have less info to work with. Be sure to bring a lens with wide aperture capabilities to counteract this. Be prepared to brighten As mentioned above, more light is needed during this time. You’ll probably have to shoot with a higher ISO as well as use a tripod to have a slower shutter speed. Once you edit, you may need to lighten things up a bit more as well. This is assuming you don’t want darker images. If you do though, disregard this tip. Although this light occurs for such a limited time, it is still one of my favorites because […]
Read More
Even if you’ve just picked up a camera, chances are you’ve heard of the infamous “golden hour.” Also referred to as “magic hour,” this time occurs right before sunset/after sunrise and provides a very specific type of light. Many prefer the warmth & glow this light creates for their portraits and will recommend it to others. Not typically my choice because of the limited time window and recognizable warmth, I do on occasion shoot during this time. Here are some tips & examples below. Scout beforehand If you have a location in mind, go there before the shoot during the time you chose. You’ll be able to pick specific areas you want to place your subject, and see how the light will really look. Sometimes this timeframe is too dark for the look you’re going for, or will wind up being too yellow for your preferences. Checking ahead of time can ensure you have a backup plan if this location doesn’t work. Show up early If you’re really an early bird, you’ll have to take your subject to your location at or just before sunrise. Depending on how many shots you plan on doing, an hour may […]
Read More
Ah, the power of three. There’s something pleasing about that number. Even though it isn’t even, it usually is just enough to get what you need. Key Light, Fill Light, & Back Light One of the most done studio setups of all time. There’s a reason it’s been used for so many years by so many different photographers. It works. The results are solid. And it’s incredibly simple to set up. Your main light is in front of your subject, slightly to the side, your fill on the other side, & your back light behind them and skimming their head. Since the above is so well known, let’s try 3 other arrangements. 2 Side Lights & a Front Light Place 1 light on one side of your subject and the other directly opposite it. Use your third light as a center key light facing the subject. All of your shadows will be diminished and this will give you a very high key look. 2 Back Lights & a Front Light Place 1 light slightly to the side, yet behind the subject. Put the second light on the other side. For your front light, place it […]
Read More
The tips revealed in my 1 point lighting setup can be used with two lights as well! Key Light & Fill Light I’ve set up my key on one side, slightly in front of the subject with the fill on the other side. See how this provides balance and softens up some of those harsh shadows? Key light & Background light Leave the key light in the same place, and move the second behind your subject, pointing towards their background. There’s a bunch of different effects photographers apply such as gels for different colors or cutout stencils for cool shapes. Key light & hair light Keep the key where it is and simply tilt your second light so it skims the top of your subject’s head. Hair light is continuously used to help separate the subject from their background. This is especially helpful if their hair color is similar to the wall/environment. The methods above are all very common so you’ve probably seen images lit these ways before. Hopefully they still can guide you as you try your hands at a 2 point setup! May the light be with you. […]
Read More
It’s easy to fall into the thought that 1 of something is “limiting” or “not enough” when that simply isn’t the case. You can achieve many different looks with only 1 light and possibly the addition of a reflector. Here are 5 setups to give you some ideas for your own shoots. Sunlight is one major light source, but I won’t be talking about it today. Check out this post to learn more about the different ways to use natural light. The type of light I’ll be using is a small LED on a light stand. You may try these techniques with other artificial light sources as well. Check out my softbox & flash posts for even more tips. Center Front The most basic and probably instinctual way to light a subject. Place your light right in the center of your subject, typically above your camera. This produces an even light and diminishes all shadows on their face. Side Front The most common way to light a subject (even in multiple lighting setups.) Place your light slightly above your subject to mimic our natural view. Side This can provide very dramatic results. Because only one side […]
Read More
This process is also termed “long exposure photography” because a slow shutter speed is required in order to capture the light streaks. Here are a few different ways you can paint with light! Possible light sources to use: Flashlight Sparklers Phone Technical details: You must put your camera on a tripod or otherwise stable surface. Your shutter speed should be set very slowly. 5 seconds to 1 minute is usually the range. Your room needs to be completely dark. (If it isn’t, the ambient light will be caught and the painted light will be harder to see) I used this technique for my Itzpapalotl challenge and thoroughly enjoyed it. May the light be with you. Follow
Read More
If I had to pick only 1 way to light my subjects for the rest of my days, it would be natural light. Though artificial lights like flash & softboxes can be useful when continuous control is required, I still find the quality of light provided by the sun to be the most appealing. I’d like to share the different types of natural light as well as a couple pros & cons for each. Natural light based on location: Window light (the easiest way to use natural light. Simply place someone beside a window and you’re set) Pro: located in most buildings & easy to access. Con: Can cause a harsh shadow on the opposite side of the subject. Open Shade (having a person under the shade and facing towards the sun) Pro: Gorgeous shaping of facial features and soft shadows. Con: I honestly can’t think of any! Closed Shade (when your subject is not only under a shaded area, but also when they are facing away from the sun) Pro: Even light without harsh shadows. Con: Flare is a possibility which may wash out your image. Backlit (when your subject […]
Read More
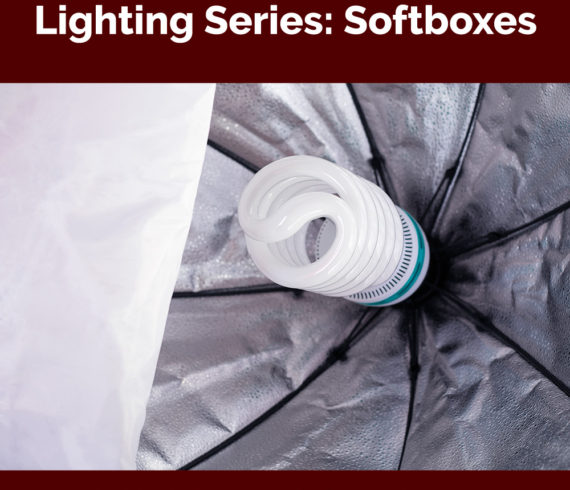
For this week’s lighting tip, I’d like to focus on one of my favorite types: softboxes. There are many affordable kits to start with, and they’re also very easy to use, so they’re great for beginners. Here are a few pros and cons, as well as tips for using them! Pros: Affordable Can be used for photography & video Provides soft, even lighting Cons: Bulky Take extra time to set up Relies on electricity or some other comparable power source Unless you have a team to help you with weatherproof wires and such, I’d stick to using these inside. No need to risk electrocution for any shot! Because these are larger lighting apparatuses, it would be difficult to hide this behind a subject. These work well for main lights as well as fill lights if distanced further away. For example, if you’re using a window as your main light, you could put a soft box a bit back beside the subject for a very even looking fill. In regards to video, these are excellent for interviews, vlogs, or documentary style setups that take place in a controlled environment inside. As long as you have access […]
Read More