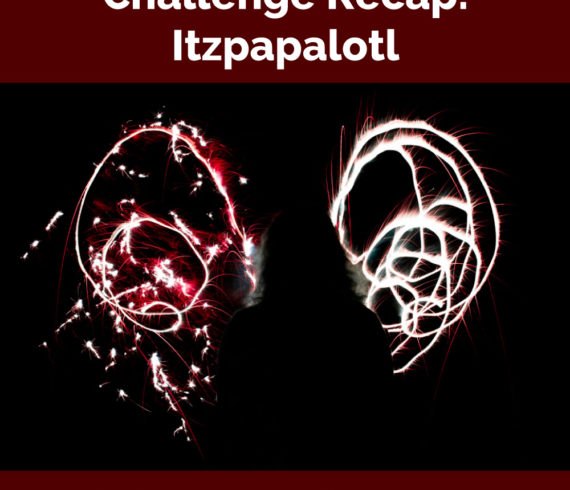
For this month I combined 3 challenges: silhouette, paint with light, and sparklers. Thanks to all the festivities and great friends, I was able to create some awesome photos. I had the image in my mind after reading about the “Obsidian Butterfly” myth. I was beyond intrigued, and I knew these three combined together would perfectly represent her. So here are some of those shots! This was a test shot seeing how the light trails from flashlights could shape the wings. This was another test using typical sparklers. These were “Morning Glorys” which were like giant sparklers that burned different colors. I ultimately went with these and had my friend draw wing-like shapes behind my subject. Once the timer went off, I was able to jump in on the ground in front of her and draw swirls with the flashlights which gave even more oomph to the shot. This challenge was so fun and surprisingly simple to do. This was my first time trying long exposure with light/sparklers but knew it was always something I wanted to do. I tested a few beforehand to make sure I had the right shutter speed and aperture, so that prep really […]
Read More
There are 3 different sizes of bag that I can choose from depending on needs for a particular shoot. They are all crossbody style & are of the leather variety i.e. they don’t look like typical camera bags. I’m not really a fan of how the nylon bags look aesthetic-wise, plus they call more attention to yourself while out traveling as opposed to a messenger bag. These are what I use at the moment for occasional freelancing, but I expect I’d need heavier duty types if I worked commercially and traveled a lot with a lot of gear. Small (One camera body with lens on it + one extra lens, extra batteries, cards, charger.) This is the perfect size for a casual day bag. Dimensions: 9″ W x 6.5″ H x 7″ D I found this brand new from Goodwill, but here it is to order. Medium (One camera with lens on it + two extra lenses, one external flash, extra batteries, cards, charger, etc.) I like to use this as my everyday work bag or for simple shoots like headshots. Dimensions: 13″ W x 8″ H x 4″ D This one I also found secondhand at […]
Read More
This niche is closely related to other specialties such as lifestyle & documentary photography, but it differs in a major way. Typically subjects are strangers who you just happen across out and about, not models or clients hired for the job. There are two methods street photographers usually take: conspicuous & covert. Conspicuous Fearlessness is a must when going this route. Much like asking someone out, the photographer must be prepared for the chance of rejection. A help would be to compliment the person, tell them you’re working on a project, and/or have a business card ready to hand over with your email so they have a way to reach out and ask about the photo (then concurrently, you will have a way to send it to them.) You have a chance to guide this individual and if they’re willing, they can even do different poses for you. Covert This is the method I go for because talking to strangers is still nerve racking to me. Stealth is a key skill with this route. Blending in with your surroundings, or going to an already bustling area where people are focused on what they’re doing will yield more […]
Read More
Over the past few years I’ve found an efficient workflow and thought that sharing might be interesting to some. (Disclaimer, I do not currently have Lightroom which seemingly every photographer swears by. Perhaps I’ll get it when I have a desktop, but for the moment, I find this workflow to do just fine.) After a shoot, I go through the images while they are still in camera and delete the definite no’s. I do this here because I’ve learned that the limited memory on my hard drive fills up ridiculously quickly if every image gets transferred. Once I have only the best left, I transfer them over to my drive. When that is complete, I IMMEDIATELY back up those images on my separate backup drive. (Better safe than sorry!) Once I have everything copied over, I like to open up the folder in Adobe Bridge. This is the way our professor taught us how to review our images before editing, and I find it much more helpful than the default preview on the computer. I go through each image and give them ratings. 5 stars are ultimate favorites, 4 stars are those I really like, and 3 stars […]
Read More
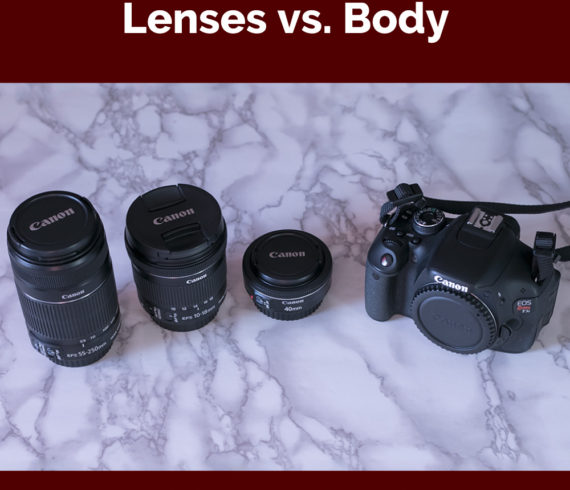
Oh boy. This topic surely is one for discussion. Obviously both a lens and a camera body need to be joined for a DSLR to operate, but the question many photographers have when starting out is “which should I invest more in?” Here I want to share my experiences from working with both Canon Rebels & a Full Frame as well as a variety of lenses. Camera Bodies Cropped sensor Rebel T3 I actually started out with the T3 but I grew tired of not being able to see myself for recording vlogs. I didn’t take many photos with the T3, but I found a definite increase in quality compared to my previous Powershoot. Cropped sensor Rebel T3i I sold the T3 & upgraded to the T3i and really delved into photography more. I found that this camera really helped me become better, and felt no shame at it being a comparatively ‘beginner’ body compared to others, because I was still able to produce images I was proud of. After many years of use, I was starting to crave an upgrade, so I began saving and set my eyes on a full frame body that would aid […]
Read More
This was another very busy month, so I went with a less time intensive challenge and picked “a frame within a frame.” I was able to get this image back when I visited my bestie in LA a few months back at an awesome bookstore out there. Although these challenges are primarily meant to be new conceptual work, I see nothing wrong with using images captured on vacation if they fit the specific theme picked. So don’t ever let strict rules stop you from sharing; modify them so you can still post according to your original schedule. May the light be with you. Follow
Read More
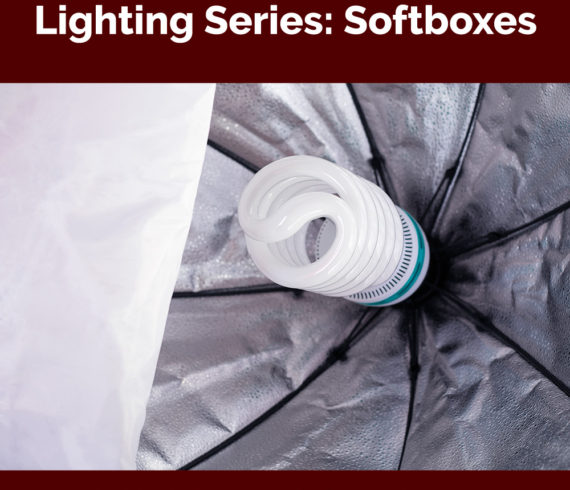
For this week’s lighting tip, I’d like to focus on one of my favorite types: softboxes. There are many affordable kits to start with, and they’re also very easy to use, so they’re great for beginners. Here are a few pros and cons, as well as tips for using them! Pros: Affordable Can be used for photography & video Provides soft, even lighting Cons: Bulky Take extra time to set up Relies on electricity or some other comparable power source Unless you have a team to help you with weatherproof wires and such, I’d stick to using these inside. No need to risk electrocution for any shot! Because these are larger lighting apparatuses, it would be difficult to hide this behind a subject. These work well for main lights as well as fill lights if distanced further away. For example, if you’re using a window as your main light, you could put a soft box a bit back beside the subject for a very even looking fill. In regards to video, these are excellent for interviews, vlogs, or documentary style setups that take place in a controlled environment inside. As long as you have access […]
Read More
Like when seeking out any sort of physical object to buy, I began looking for reviews and comparisons. Of all the reviews I read, the top two that came out were ProDPI & WHCC. I think while looking at particular print examples, I went with ProDPI for the color, quality, & price. When using this lab, you have to set up an account (it’s free) and download their uploading software. It does seem to be an extra step, but they probably have it that way to keep track of orders easier and not have giant files directly on their site. The images should be the exact size you want them to print, 300dpi as expected, but surprisingly in RGB color mode. I had them in CMYK but had to switch them when they weren’t “recognized” by the uploader. I find it a little strange that they want RGB color since every other time I’ve dealt with print it’s been in CMYK, but a friend told me many newer, high-end printers are able to recognize and reproduce RGB even better. This brings us to the most important aspect of all: image quality. I Was. Blown. Away. […]
Read More
As we advance further with technology and approach a mainly virtual world, the notion that ‘print is dead’ has grown a great deal. And though many aspects of our lives are more convenient in a digital format, there are still advantages to having print incorporated one way or another. Here are some pros & cons to each format in regards to photographs. Print Pros: Archival Can be displayed on a wall for other people to see Can be shared in books, magazines, & cards Can be made quite large (depending on resolution/megapixels), so every detail can be seen Cons: Can be subject to wear & tear if handled frequently Can be damaged by fire, flooding, & all other natural disasters Uses ink & paper (will eventually be thrown away) Digital Pros: Convenient Uses light to be seen, no physical products (better for the environment) Can be posted online for potentially the world to see Can be sent quickly in email or messages to others Cons: Can be lost, deleted, or corrupted Relies on internet connection or data plan in order to be posted/sent Needs electricity or battery power on the device to be displayed […]
Read More
This month was quite busy, but I wasn’t going to let that stop me from continuing my challenge. I had the perfect opportunity to do so at Comic Con with my picks; fantasy & a portrait without a face. I went on my b-day and was able to see a bunch of other folks dressed up as well. I had such a fun time! The featured image & the top one fulfill the ‘portrait without a face’ part, but the rest are definitely within the fantasy realm. May my nerdiness inspire you! May the light be with you. Follow Save Save Save Save Save Save Save Save
Read More